Ingredients:
1. 50gm sunflower oil
2. 80gm milk
3. 1/2 teaspoon yeast
4. 1 teaspoon of brown sugar
5. 1/2 teaspoon of sea-salt
6. 20gm of pandan leaves extract (for recipe, click on the LINK)
7. 400gm of organic high-protein bread flour
-----------------------------------------
1. Place the milk, oil, yeast and sugar into the TMX jug.
2. Set 2minutes/37C/Speed 2.
3. Then add the pandan extract.
4. Set 2 minutes/Speed 1.
5. Add the flour and salt.
6. Set the kneading function for 3 minutes. (If the dough is too crumbly, add some water until it forms a smooth dough. If it is too wet, add some flour until it becomes smooth.)
7. Knead for another 5 minutes.
8. Pour the dough out onto an oiled bowl. Leave it aside for approximately two hours for it to rise.
9. Once it has risen, knock it back down.
10. Divide the dough into two parts, place them into loaf pans and allow it to rise again.
11. Preheat the oven at 180C.
12. Bake for approximately 1/2 hour or until it is golden brown.
13. Once done, allow it to cool before slicing the bread.
Bon appétit!
A girl who survived death and was given a second chance at life, this blog is about life and on how to live a 'chemical+salicylate-free-life' in a 'chemical+salicylate world' to the best that she can.
Showing posts with label Milk. Show all posts
Saturday, 2 January 2016
Monday, 7 December 2015
Thermomix Gluten-Free Pancakes
Ingredients:
1. 100gm butter
2. 600gm water OR milk
3. 4 eggs (I used 5 as I bought kampung eggs. They're really small eggs.)
4. 250gm white rice flour (Click on Thermomix Ground Rice Flour on how to make your own home ground rice flour.)
5. 150gm sorghum flour
6. 1/2 tablespoon of sea-salt
7. Sunflower oil
8. 1/2 teaspoon of baking powder
----------------------------------------------
1. Place butter into TMX jug. Melt at 2min/75C/Speed 1.
2. Add the milk/water, eggs, flour, baking powder, sea-salt and sunflower oil. Mix at 20seconds/Speed 4.
3. You can spread some oil in a frying pan on medium heat.
4. Pour a ladle of batter and cook 1 to 2 minutes or until slightly browned. Flip it over and continue cooking.
5. Finish all the batter.
6. Serve it warm.
Bon appétit!
2. Add the milk/water, eggs, flour, baking powder, sea-salt and sunflower oil. Mix at 20seconds/Speed 4.
3. You can spread some oil in a frying pan on medium heat.
4. Pour a ladle of batter and cook 1 to 2 minutes or until slightly browned. Flip it over and continue cooking.
5. Finish all the batter.
6. Serve it warm.
Bon appétit!
Friday, 8 May 2015
Cashew Milk
Ingredients:
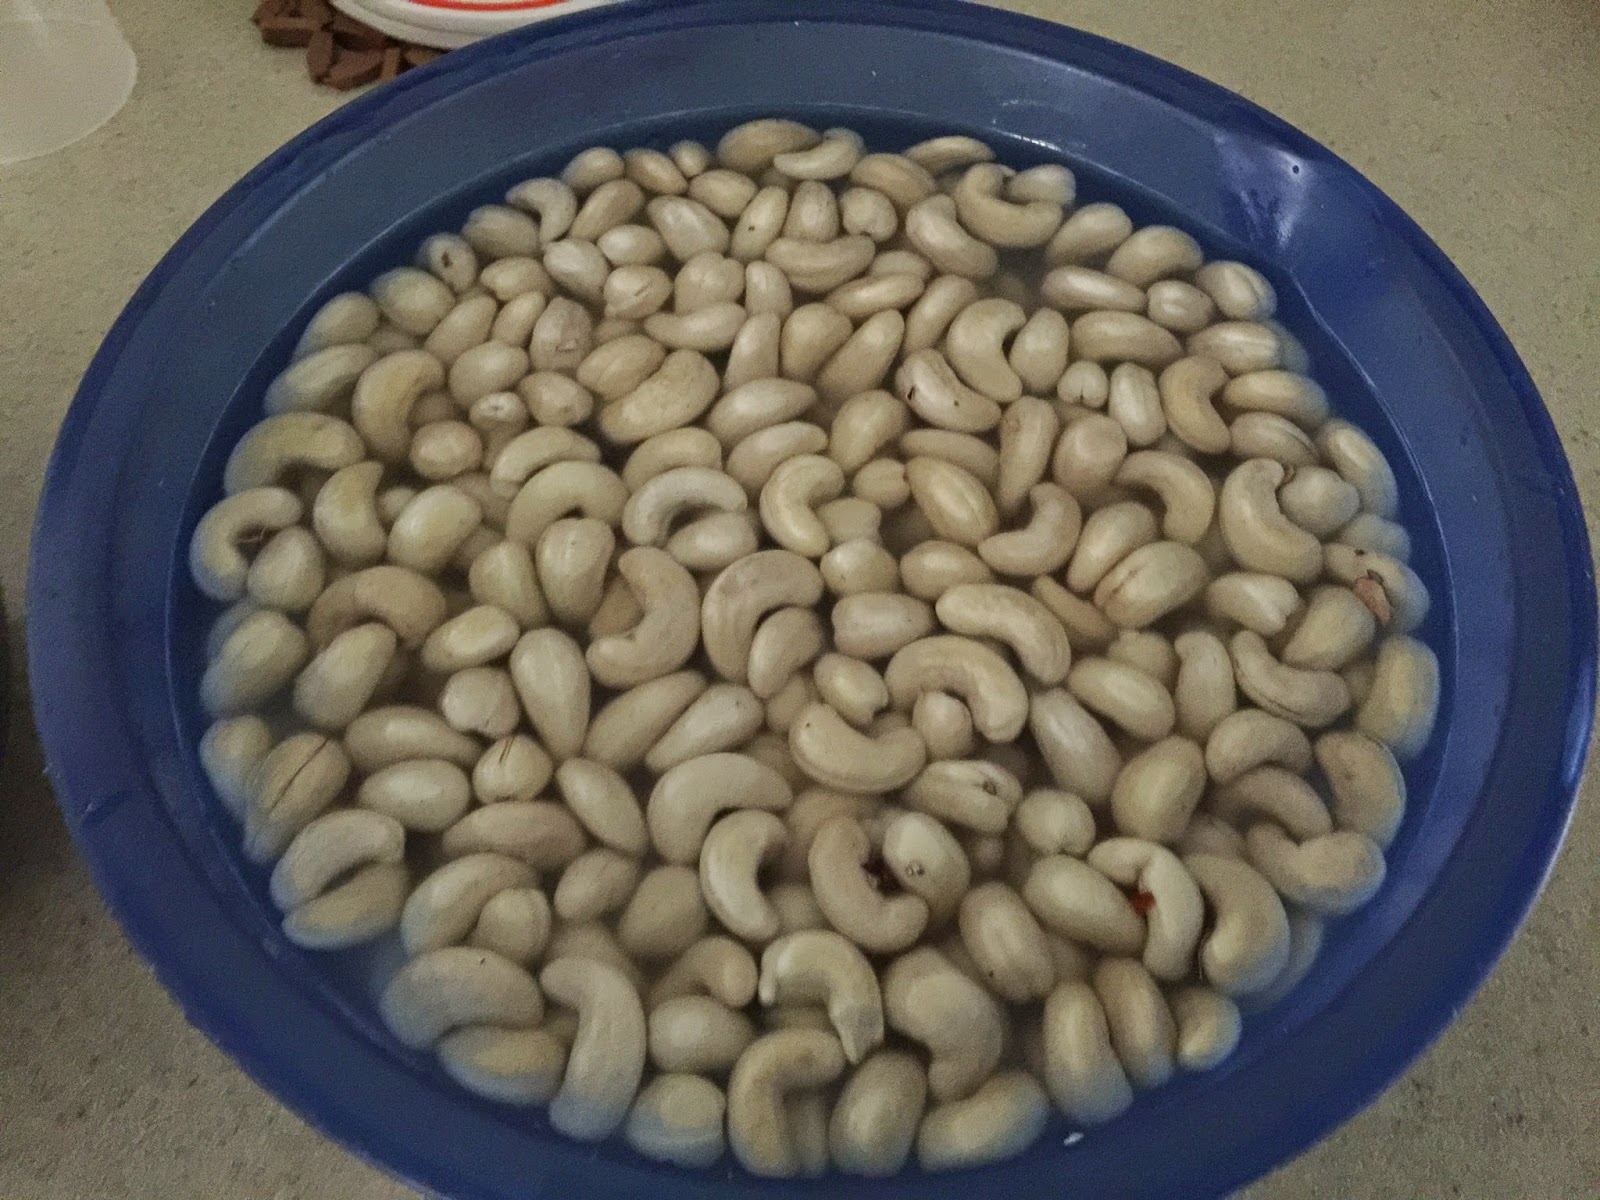
1. 1+ cup of soaked cashews (soak them overnight to get rid of the phytic acid)
| I soaked 1kg of cashew nuts. I baked the rest of the nuts. |
2. 800ml of filtered water
-------------------------------------
1. My soya maker was used to blend this milk. It grounded the cashew nuts and boiled it for about 1/2 hour.
2. You can either choose to sieve the milk or leave it with the fine grounded cashews.
3. Serve it hot.
Sunday, 28 December 2014
Christmas 2014 (Part Four): Death By Chocolate
Ingredients:
A. For the cake:
1. 200gm of good quality dark chocolate
2. 200gm butter (softened at room temperature)
3. 1/2 cup of dark brown sugar
4. 1 teaspoon of pure vanilla extract
5. 3 eggs (room temperature)
6. 1 1/2 cups of organic self-raising flour
7. 2 tablespoons of good quality cocoa
8. 1/2 cup of full-cream milk
B. For the icing:
1. 200gm of good quality dark chocolate
2. 1 cup of whipped cream
C. For decoraton:
1. Chocolate curls or shavings
---------------------------------------
1. Place the dark chocolate in a heatproof bowl. You can either place the bowl over a steaming saucepan filled with boiling water or a microwave. Once it has melted, set it aside to cool.
2. In a large mixing bowl, cream the butter, sugar and vanilla until light and fluffy.
3. Add the eegs, one at a time while stirring continuously.
4. Add in the melted chocolate. Mix well.
5. Sift the flour and cocoa together into a bowl.
6. Add half the flour/cocoa mixture and fold it into the mixture.
7. Add half the milk and stir gently.
8. Add the remaining flour mixture. Fold again.
9. Add the remaining milk and stir gently again.
10. Preheat oven at 160C.
11. Line a spring cake pan with baking paper.
12. Pour the mixture into the baking pan.
13. Place the baking pan onto a larger baking tray. Fill half of that tray with water.
14. Bake for approximately an hour.
15. Once it is done, allow it to cool.
16. Remove the cake from the spring pan and place on serving dish.
17. Make the chocolate icing. Melt the chocolate as in point 1. Then beat the whipping cream until it has thickened.
18. Mix the melted chocolate with the whipping cream.
19. Spread the mixture all over the cake generously.
20. Place the whipping cream into a plastic bag and turn into a pipe to make swirls decoration on the cake.
21. You can use a peel to make chocolate curls as decorations too.
22. Chill in the fridge before serving.
Bon appétit!
P.S.: I did not eat this cake either.
Labels:
Amines,
Butter,
Chocolate,
Chocolate Cake,
Christmas,
Cocoa Powder,
Dark Brown Sugar,
Dark Chocolate,
Egg,
Eggs,
Food,
Full Cream Milk,
Milk,
Organic Self-Raising Flour,
Recipe,
Vanilla Extract,
Whipping Cream
Friday, 26 December 2014
Christmas 2014 (Part Two): Classic Vanilla Pudding
Ingredients:
1. 2 cups of milk
2. 1/4 cup of sugar
3. 3 tablespoons of cornstarch
4. A dash of sea-salt
5. 1 teaspoon of vanilla extract
6. 1 tablespoon of butter
---------------------------------------
1. Combine the sugar, cornstarch and salt in a separate bowl.
2. Heat the milk in a medium sized saucepan or pot over medium heat.
3. Do not allow it to boil!
4. Once you see bubbles form at the edges, turn the fire to small and slowly add the combined ingredients in the bowl (in point 1) while stirring continuously.
5. Continue to stir until mixture thickens.
6. Turn off the heat.
7. Add the vanilla and butter and stir until well blended.
8. Pour into small cups or serving dishes.
9. Place in the fridge to chill before serving.
Bon appétit!
Monday, 6 October 2014
Cooking For Joel: The Perfect Milk
Ingredients:
1. 3 tablespoons of brown rice
2. 1/2 tablespoon of quinoa
3. 1.4 litres of water
4. *Optional: Brown sugar
--------------------------------------------
1. Wash the rice and quinoa and soak it for an hour in the fridge.
1. 3 tablespoons of brown rice
2. 1/2 tablespoon of quinoa
3. 1.4 litres of water
4. *Optional: Brown sugar
--------------------------------------------
1. Wash the rice and quinoa and soak it for an hour in the fridge.
2. Pour the water away and give it a rinse.
3. I used my Philips soya maker for the next step. If you do not own one, you can blend the mixture with the water and then strain the liquid out. You can also blend the mixture, boil it and then strain it. Or you can boil the rice with water until everything becomes mashy and then strain the liquid out.
4. The soya maker pulverized the rice and boiled it for approximately 25 minutes.
5. I did not sieve the milk out this time. We drank everything. It was as good.
Bon appétit!
Sunday, 28 September 2014
Moist & Super Fluffy Butter Cake
Ingredients:
1. 250gm unsalted butter (softened at room temperature)
2. 80gm fine sugar
3. 250gm organic self-raising flour (sieved twice)
4. 8 medium-sized eggs
5. 2 teaspoon of baking powder
6. 1 teaspoon of vanilla extract
7. * Milk (optional - unless cake batter is too thick)
-----------------------------------------------
1. In a large mixing bowl, cream the butter and the sugar until light and fluffy.
2. Separate the egg whites and yolks.
3. In a bowl, beat the egg whites until stiff peaks form.
4. In another bowl, beat the yolks.
5. Add the egg yolks into the butter/sugar mixture bit by bit while stirring continuously.
6. Then add in the egg whites into the mixture bit by bit while stirring continuously.
7. Add in the vanilla extract.
8. Fold in the flour little by little and mix with the spatula.
9. If the mixture is too thick, add in about 4 tablespoons of milk.
10. Preheat oven at 170C.
11. Line a cake tray with baking paper.
12. Pour mixture into it and bake for approximately 25 minutes or until golden brown.
13. Set aside to cool.
Bon appétit!
1. 250gm unsalted butter (softened at room temperature)
2. 80gm fine sugar
3. 250gm organic self-raising flour (sieved twice)
4. 8 medium-sized eggs
5. 2 teaspoon of baking powder
6. 1 teaspoon of vanilla extract
7. * Milk (optional - unless cake batter is too thick)
-----------------------------------------------
1. In a large mixing bowl, cream the butter and the sugar until light and fluffy.
2. Separate the egg whites and yolks.
3. In a bowl, beat the egg whites until stiff peaks form.
4. In another bowl, beat the yolks.
5. Add the egg yolks into the butter/sugar mixture bit by bit while stirring continuously.
6. Then add in the egg whites into the mixture bit by bit while stirring continuously.
7. Add in the vanilla extract.
8. Fold in the flour little by little and mix with the spatula.
9. If the mixture is too thick, add in about 4 tablespoons of milk.
10. Preheat oven at 170C.
11. Line a cake tray with baking paper.
12. Pour mixture into it and bake for approximately 25 minutes or until golden brown.
13. Set aside to cool.
Bon appétit!
![]() |
| I started to cut the cake before I suddenly remembered that I haven't taken a picture of it! |
| Moist & fluffy! |
Wednesday, 17 September 2014
Cooking For Joel: Rice & Millet Milk
I went out the other day to get some 'wheat-free' flour a.k.a 'gluten-free' flour and decided to look at the rice milk that was sold. 1L of organic rice milk was selling for RM15.90! It was like buying gold. I did take a look at the ingredients and rice was only 15%! The bulk of the drink was water. The rest was sugar, and some added vitamins and non-coagulant ingredient which I can't remember what it's called.
This is my second version of home-made rice milk. Even I drank it. And it worked very well for the stomach. It soothed it.
Ingredients:
1. 1 cup of white organic fragrant rice
2. 1/4 cup of organic millet
3. Brown sugar
------------------------------------------------------
This is my second version of home-made rice milk. Even I drank it. And it worked very well for the stomach. It soothed it.
Ingredients:
1. 1 cup of white organic fragrant rice
2. 1/4 cup of organic millet
3. Brown sugar
------------------------------------------------------
1. Preheat oven to 180C.
2. Pour 1 cup of rice and millet onto baking tray and bake for 20 minutes. (This makes the milk to be more fragrant).
3. Once it is done, allow to cool.
4. Wash the rice/millet and soak it overnight in the fridge.
5. Pour the water away and give it a rinse.
6. I used my Philips soya maker for the next step. If you do not own one, you can blend the mixture with the water and then strain the liquid out. You can also blend the mixture, boil it and then strain it. Or you can boil the rice with water until everything becomes mashy and then strain the liquid out.
7. The soya maker pulverized the rice/millet and boiled it for approximately 25 minutes.
8. Once it was done, the milk was sieved.
9. I added some brown sugar to the drink.
I found that the white rice milk becomes even thicker than the brown rice once it cools down. It became one big blob of goo. I poured water into a mug, added the milk and stirred it whenever we wanted to have a drink. I kept the remainder in the fridge in an airtight container. I am experimenting with all sorts of wheat-free (gluten free) food now. But I won't be making white rice milk anymore. Brown rice tastes better and it's healthier too.
Bon appétit!
Tuesday, 19 August 2014
Classic Vanilla Ice-Cream
Ingredients:
1. 1 vanilla pod bean
2. 300ml of low-fat milk (I did not have this and substituted with full-creamed milk)
3. 4 egg yolks (I used even the egg whites)
4. 75gm of sugar (I used half of this and it was still sweet!)
5. 5ml of cornstarch
6. 300ml of heavy cream (I did not have this too and used whipping cream instead)
------------------------------------------------
1. Slit open the vanilla pod from top to bottom. Pour the milk into a pan, add the pod and bring it to a boil. Remove the pan from the heat and leave it aside for 15 minutes.
2. Take the pod out from the milk and scrape all the seeds out into the milk. Discard the pod.
3. Boil the milk again. Set aside again while you proceed to step 4.
4. Whisk the eggs, sugar and cornflour until it has thickened and foamy. Pour this mixture into the hot milk gradually, whisking it constantly.
5. Over very low heat, stir the mixture continuously without stopping until the custard thickens and becomes smooth.
6. Pour the custard into a metal bowl or container (which can be kept in freezer) and allow it to cool.
7. Once it has cooled down, chill it in the fridge.
8. In another bowl, whip the cream until it thickens. Do not over whip it. Make sure that it still falls off from a spoon.
9. Remove the custard from the fridge and fold the whipped cream into it.
10. Freeze for approximately 6 hours or until it is firm enough to be scooped up.
11. You can either beat it with a fork or place it in a food processor.
12. Freeze it again.
13. Once it is done, ENJOY the fruits of your labour!!!!
Bon appétit!!
1. 1 vanilla pod bean
2. 300ml of low-fat milk (I did not have this and substituted with full-creamed milk)
3. 4 egg yolks (I used even the egg whites)
4. 75gm of sugar (I used half of this and it was still sweet!)
5. 5ml of cornstarch
6. 300ml of heavy cream (I did not have this too and used whipping cream instead)
------------------------------------------------
1. Slit open the vanilla pod from top to bottom. Pour the milk into a pan, add the pod and bring it to a boil. Remove the pan from the heat and leave it aside for 15 minutes.
2. Take the pod out from the milk and scrape all the seeds out into the milk. Discard the pod.
3. Boil the milk again. Set aside again while you proceed to step 4.
4. Whisk the eggs, sugar and cornflour until it has thickened and foamy. Pour this mixture into the hot milk gradually, whisking it constantly.
5. Over very low heat, stir the mixture continuously without stopping until the custard thickens and becomes smooth.
6. Pour the custard into a metal bowl or container (which can be kept in freezer) and allow it to cool.
7. Once it has cooled down, chill it in the fridge.
8. In another bowl, whip the cream until it thickens. Do not over whip it. Make sure that it still falls off from a spoon.
9. Remove the custard from the fridge and fold the whipped cream into it.
10. Freeze for approximately 6 hours or until it is firm enough to be scooped up.
11. You can either beat it with a fork or place it in a food processor.
12. Freeze it again.
13. Once it is done, ENJOY the fruits of your labour!!!!
Bon appétit!!
Monday, 4 August 2014
Hokkaido Milk Buns
Ingredients:
1. 5 cups of organic strong bread flour
2. 1 teaspoon of sea-salt
3. 1 tablespoon of soft brown sugar
4. 2 large eggs OR 3 medium-sized eggs (set a small amount aside for glazing of buns)
5. 1 cup of milk
6. 4 teaspoons of instant yeast
7. 6 tablespoons of butter (small pieces and softened at room temperature)
8. 1 serving of tangzhong*
- 1/3 cup of bread flour
- 1 cup of water
------------------------------------------
1. In order for the Hokkaido bun to be soft, tender and fluffy, there is an ingredient which must be used. It is called the 'Tangzhong' or 'Water Roux'.
2. To make the 'tangzhong', mix the 1/3 cup of flour and water together.
3. Boil this over low medium heat. Stir continuously. Cook it until it thickens.
4. Set it aside once it looks something like the picture above.
5. In a large mixing bowl, add the flour, salt, and instant yeast.
6. Make a well in the centre and add the wet ingredients (milk, eggs and tangzhong).
7. Mix all ingredients well and knead until the dough becomes smooth.
8. Add the butter and knead again.
9. You can roll them into shapes that you like or just make a round bun shape or even a normal loaf. It is entirely up to you.
10. Grease your baking trays or moulds with butter or oil.
11. Once you have prepared all your pre-baked bun shapes and placed them in the baking trays/moulds, set aside for them to rise.
12. Preheat oven at 175C.
13. Just before baking, brush some beaten egg mixture on top of the buns to have a beautiful browned and shiny top.
14. Bake for approximately 30 minutes.
Bon appétit!
1. 5 cups of organic strong bread flour
2. 1 teaspoon of sea-salt
3. 1 tablespoon of soft brown sugar
4. 2 large eggs OR 3 medium-sized eggs (set a small amount aside for glazing of buns)
5. 1 cup of milk
6. 4 teaspoons of instant yeast
7. 6 tablespoons of butter (small pieces and softened at room temperature)
8. 1 serving of tangzhong*
- 1/3 cup of bread flour
- 1 cup of water
------------------------------------------
1. In order for the Hokkaido bun to be soft, tender and fluffy, there is an ingredient which must be used. It is called the 'Tangzhong' or 'Water Roux'.
2. To make the 'tangzhong', mix the 1/3 cup of flour and water together.
3. Boil this over low medium heat. Stir continuously. Cook it until it thickens.
4. Set it aside once it looks something like the picture above.
5. In a large mixing bowl, add the flour, salt, and instant yeast.
6. Make a well in the centre and add the wet ingredients (milk, eggs and tangzhong).
7. Mix all ingredients well and knead until the dough becomes smooth.
8. Add the butter and knead again.
9. You can roll them into shapes that you like or just make a round bun shape or even a normal loaf. It is entirely up to you.
10. Grease your baking trays or moulds with butter or oil.
11. Once you have prepared all your pre-baked bun shapes and placed them in the baking trays/moulds, set aside for them to rise.
12. Preheat oven at 175C.
13. Just before baking, brush some beaten egg mixture on top of the buns to have a beautiful browned and shiny top.
14. Bake for approximately 30 minutes.
Bon appétit!
Friday, 1 August 2014
Sugar Butter Buns
Ingredients:
1. 270gm of organic strong bread flour
2. 30gm of organic all-purpose flour
3. 5gm of fine sea-salt
4. 2 teaspoons of instant yeast
5. 30gm of sugar (optional)
6. 50gm of unsalted butter
7. 100ml of milk
8. 2 eggs
9. 100ml of water
For the buns' topping:
1. 100gm of butter
2. 50gm of granulated sugar
---------------------------------------------------
1. Whisk together the eggs, water and milk in a bowl.
2. In a large mixing bowl, pour the flours, sugar, yeast and salt. Mix them.
3. Make a well in the centre of the flour mixture and pour in the wet mixture.
4. Mix everything together and knead the dough.
5. Incorporate the butter into the dough and fold and knead until dough is soft, pliable and smooth (about 15 to 20 minutes).
6. If the dough is sticky, add a bit of flour and continue kneading.
7. Put the dough aside and let it rise for an hour.
8. Knock the risen dough down and knead again.
9. Line a baking tray with baking paper.
10. Preheat oven at 180C.
11. Break the dough into 12 small round pieces.
12. Flatten the little pieces of dough and let them rise.
13. Slit all 12 pieces of dough and place pieces of butter in the slits. Sprinkle the granulated sugar over them.
14. Bake for about 20 minutes or until golden brown.
15. Allow to cool before serving.
Bon appétit!
1. 270gm of organic strong bread flour
2. 30gm of organic all-purpose flour
3. 5gm of fine sea-salt
4. 2 teaspoons of instant yeast
5. 30gm of sugar (optional)
6. 50gm of unsalted butter
7. 100ml of milk
8. 2 eggs
9. 100ml of water
For the buns' topping:
1. 100gm of butter
2. 50gm of granulated sugar
---------------------------------------------------
1. Whisk together the eggs, water and milk in a bowl.
2. In a large mixing bowl, pour the flours, sugar, yeast and salt. Mix them.
3. Make a well in the centre of the flour mixture and pour in the wet mixture.
4. Mix everything together and knead the dough.
5. Incorporate the butter into the dough and fold and knead until dough is soft, pliable and smooth (about 15 to 20 minutes).
6. If the dough is sticky, add a bit of flour and continue kneading.
7. Put the dough aside and let it rise for an hour.
8. Knock the risen dough down and knead again.
9. Line a baking tray with baking paper.
10. Preheat oven at 180C.
11. Break the dough into 12 small round pieces.
12. Flatten the little pieces of dough and let them rise.
13. Slit all 12 pieces of dough and place pieces of butter in the slits. Sprinkle the granulated sugar over them.
14. Bake for about 20 minutes or until golden brown.
15. Allow to cool before serving.
Bon appétit!
Monday, 4 November 2013
Chocolate Marble Cake
Ingredients:
1. 225gm of butter (softened at room temperature)
2. 50gm of soft brown sugar
3. 4 eggs (room temperature)
4. 225gm of organic self-raising flour
5. 1/2 cup of milk
6. 1 teaspoon of vanilla extract
7. 2 tablespoons of cocoa powder
--------------------------------------------------------
1. In a large mixing bowl, beat the butter and sugar together.
2. Add the eggs, one at a time; mixing well after each egg.
3. Add the flour, milk and vanilla and fold until mixture is smooth.
4. Divide the mixture into 2 bowls.
5. Stir the cocoa powder into one of the bowls.
6. Line a baking pan with baking paper.
7. Preheat oven at 170C.
8. Using two different spoons, drop dollops of the chocolate and the plain cake mixes into the baking pan alternately.
9. Take a chopstick and swirl the mixture around to create a marble effect.
10. Bake for 45 minutes.
11. Allow to cool. You can keep it in the fridge for about a week or in the freezer for 3 months.
Bon appétit!
1. 225gm of butter (softened at room temperature)
2. 50gm of soft brown sugar
3. 4 eggs (room temperature)
4. 225gm of organic self-raising flour
5. 1/2 cup of milk
6. 1 teaspoon of vanilla extract
7. 2 tablespoons of cocoa powder
--------------------------------------------------------
1. In a large mixing bowl, beat the butter and sugar together.
2. Add the eggs, one at a time; mixing well after each egg.
3. Add the flour, milk and vanilla and fold until mixture is smooth.
4. Divide the mixture into 2 bowls.
5. Stir the cocoa powder into one of the bowls.
6. Line a baking pan with baking paper.
7. Preheat oven at 170C.
8. Using two different spoons, drop dollops of the chocolate and the plain cake mixes into the baking pan alternately.
9. Take a chopstick and swirl the mixture around to create a marble effect.
10. Bake for 45 minutes.
11. Allow to cool. You can keep it in the fridge for about a week or in the freezer for 3 months.
Bon appétit!
Tuesday, 22 October 2013
Moist Banana Cake
Ingredients:
1. 250gm salted butter (softened at room temperature)
2. 2 tablespoons of soft, brown sugar
3. 4 eggs
4. 1 teaspoon of vanilla essence
5. 4 tablespoons of milk (liquid)
6. 2 tablespoons of powdered milk (do not mix with water)
7. 6 to 7 medium sized bananas
8. 2 cups of organic plain flour
9. 1 teaspoon of baking soda
10. 1 teaspoon of baking powder
---------------------------------------------------------------------
1. Cream butter and sugar in a large mixing bowl.
2. Add in the eggs, one by one.
3. Add in the vanilla essence and milk (liquid) and mix throughly.
4. Add the mashed banana into the mixture and mix well.
5. Add the sifted flour, powdered milk, baking soda and baking powder bit by bit and mix thoroughly.
6. Preheat oven at 160C.
7. Pour the batter into a baking tin lined with baking paper.
8. Bake for 1 hour or until golden brown.
9. Allow to cool.
10. You can slice it and keep it in the fridge or the freezer (if you want to keep it longer).
1. 250gm salted butter (softened at room temperature)
2. 2 tablespoons of soft, brown sugar
3. 4 eggs
4. 1 teaspoon of vanilla essence
5. 4 tablespoons of milk (liquid)
6. 2 tablespoons of powdered milk (do not mix with water)
7. 6 to 7 medium sized bananas
8. 2 cups of organic plain flour
9. 1 teaspoon of baking soda
10. 1 teaspoon of baking powder
---------------------------------------------------------------------
1. Cream butter and sugar in a large mixing bowl.
2. Add in the eggs, one by one.
3. Add in the vanilla essence and milk (liquid) and mix throughly.
4. Add the mashed banana into the mixture and mix well.
5. Add the sifted flour, powdered milk, baking soda and baking powder bit by bit and mix thoroughly.
6. Preheat oven at 160C.
7. Pour the batter into a baking tin lined with baking paper.
8. Bake for 1 hour or until golden brown.
9. Allow to cool.
10. You can slice it and keep it in the fridge or the freezer (if you want to keep it longer).
Wednesday, 28 August 2013
The Rice-Cooker Bread
Someone posted this on FB and I was immediately captivated by the idea. I cook practically everyday with my rice pot! Why not make bread with it????
I tweaked the recipe a bit and made a wholemeal version instead. I also used sunflower oil instead of butter.
Ingredients:
1. 350g of organic wholemeal flour
2. 1/2 a cup of organic cow milk powder
3. 1/4 cup of sunflower oil
4. 1 tablespoon of soft brown sugar
5. 1/2 cup of warm water
6. 5g of active dry yeast
7. 1/2 teaspoon of sea-salt
----------------------------------------------------------------
1. In a medium sized bowl, add the warm water, a dash of brown sugar and yeast. Wait for about 15 minutes for the yeast to froth.
2. Pour the flour, milk powder, sugar, salt, yeast water and sunflower oil into the rice pot.
3. Mix all ingredients.
4. Knead until dough is smooth and elastic.
5. Put aside in a warm place for 1 hour to allow the dough to rise.
6. Punch it back down and place it aside for another 1 hour.
7. Once it has risen a second round, you can start cooking your bread.
8. Choose the 'cooking rice' function and cook for 1 hour.
9. Once the first hour is up, turn the bread over and cook for another 1 hour.
10. I only cooked mine for two hours though the original recipe required 3 hours. Serve hot once the bread is done! You can either eat it plain or with some butter.
Bon appétit!
I tweaked the recipe a bit and made a wholemeal version instead. I also used sunflower oil instead of butter.
Ingredients:
1. 350g of organic wholemeal flour
2. 1/2 a cup of organic cow milk powder
3. 1/4 cup of sunflower oil
4. 1 tablespoon of soft brown sugar
5. 1/2 cup of warm water
6. 5g of active dry yeast
7. 1/2 teaspoon of sea-salt
----------------------------------------------------------------
1. In a medium sized bowl, add the warm water, a dash of brown sugar and yeast. Wait for about 15 minutes for the yeast to froth.
2. Pour the flour, milk powder, sugar, salt, yeast water and sunflower oil into the rice pot.
3. Mix all ingredients.
4. Knead until dough is smooth and elastic.
5. Put aside in a warm place for 1 hour to allow the dough to rise.
6. Punch it back down and place it aside for another 1 hour.
7. Once it has risen a second round, you can start cooking your bread.
8. Choose the 'cooking rice' function and cook for 1 hour.
9. Once the first hour is up, turn the bread over and cook for another 1 hour.
10. I only cooked mine for two hours though the original recipe required 3 hours. Serve hot once the bread is done! You can either eat it plain or with some butter.
Bon appétit!
Below is the YouTube video on how to make rice cooker bread. Happy cooking!
Monday, 25 February 2013
Super Moist Chocolate Cake
My mom attended a gathering yesterday with her friends. I made a chocolate cake for them. Below is the recipe:
Ingredients:
1. 1 1/2 cups of milk
2. 100gm of butter
3. 1/4 cup of sunflower oil
4. 1/2 cup of cocoa powder
5. 1 cup of self-raising flour
6. 1 egg (beaten) - room temperature
7. 1/2 teaspoon of baking soda
8. 100gm of brown sugar
-------------------------------------------------------------------
1. Heat milk, butter, oil and cocoa powder until the butter melts.
2. Set aside to cool.
3. In another bowl, add flour, baking soda, sugar and beaten egg to the cooled wet ingredients.
4. Preheat oven at 170C.
5. Beat/whisk until all ingredients are mixed well.
6. Bake for 20 to 30 minutes.
7. Remove from oven promptly once cake is done. Allow to cool.
8. Dust lightly with icing sugar.
Bon appétit!
Ingredients:
1. 1 1/2 cups of milk
2. 100gm of butter
3. 1/4 cup of sunflower oil
4. 1/2 cup of cocoa powder
5. 1 cup of self-raising flour
6. 1 egg (beaten) - room temperature
7. 1/2 teaspoon of baking soda
8. 100gm of brown sugar
-------------------------------------------------------------------
1. Heat milk, butter, oil and cocoa powder until the butter melts.
2. Set aside to cool.
3. In another bowl, add flour, baking soda, sugar and beaten egg to the cooled wet ingredients.
4. Preheat oven at 170C.
5. Beat/whisk until all ingredients are mixed well.
6. Bake for 20 to 30 minutes.
7. Remove from oven promptly once cake is done. Allow to cool.
8. Dust lightly with icing sugar.
Bon appétit!
Thursday, 19 July 2012
Salicylate-Free Wholemeal Digestive Biscuits!
Ingredients:
1. 100g organic wholemeal flour
*Alternatively, you could mix 80g organic wholemeal flour with 20g organic all-purpose flour.
2. 1 tablespoon of baking powder
3. 40gm of light, brown sugar
4. 120gm of salted butter.
5. 2 to 3 tablespoons of milk
(I did not add oats to the biscuits this round. If you prefer to add oats to them, add 100gm of fine, grounded oats.)
--------------------------------
1. Melt the butter.
2. Mix the flour, baking powder, and brown sugar into a large bowl.
3. Add the melted butter into the dry ingredients and mix until crumbly.
4. Add the milk until a smooth dough is formed.
5. Wrap the dough in cling wrap and store it in the fridge for about 1/2 hour.
6. Preheat the oven to 180C.
7. Remove the dough from the cling wrap and roll it into a long cylinder shape. You can cut small circle shapes 0.4cm in thickness. Alternatively, you can scoop out a tablespoon size of dough and flatten it with the back of a spatula.
8. Bake for about 20 minutes or until lightly golden brown.
9. Lay aside to cool.
10. Store in airtight containers. I kept mine in the fridge.
Bon appétit!
1. 100g organic wholemeal flour
*Alternatively, you could mix 80g organic wholemeal flour with 20g organic all-purpose flour.
2. 1 tablespoon of baking powder
3. 40gm of light, brown sugar
4. 120gm of salted butter.
5. 2 to 3 tablespoons of milk
(I did not add oats to the biscuits this round. If you prefer to add oats to them, add 100gm of fine, grounded oats.)
--------------------------------
1. Melt the butter.
2. Mix the flour, baking powder, and brown sugar into a large bowl.
3. Add the melted butter into the dry ingredients and mix until crumbly.
4. Add the milk until a smooth dough is formed.
5. Wrap the dough in cling wrap and store it in the fridge for about 1/2 hour.
6. Preheat the oven to 180C.
7. Remove the dough from the cling wrap and roll it into a long cylinder shape. You can cut small circle shapes 0.4cm in thickness. Alternatively, you can scoop out a tablespoon size of dough and flatten it with the back of a spatula.
8. Bake for about 20 minutes or until lightly golden brown.
9. Lay aside to cool.
10. Store in airtight containers. I kept mine in the fridge.
Bon appétit!
| Waiting for oven to be ready. |
| Fresh out of the oven! |
| Ready to be kept in the fridge! |
Subscribe to:
Posts (Atom)